
What if the most exquisite fabric in your collection wasn’t discovered in a boutique, but emerged, shimmering and transformed, from your own creative space? The prospect of dyeing silk velvet at home often feels like a gamble between achieving a bespoke masterpiece and permanently crushing a precious investment. You likely worry that the delicate pile will lose its bounce or that the colour will settle in unsightly blotches rather than a deep, even glow. We understand that hesitation; the difference between a ruined scrap and a luminous treasure lies in the subtle chemistry of protein fibres and a gentle hand.
In this guide, you’ll discover the artisanal secrets to transforming 100% silk velvet into a vibrant work of art whilst preserving its signature handle. We’ll explore why choosing pure silk over harsh viscose blends is essential for a truly soft finish. You’ll learn the exact dye chemistry required for protein fibres and the techniques needed to restore that high-lustre pile. From initial swatching on natural silk packs to the final rinse, we’ll walk through every step to ensure your velvet remains supple and beautiful.
Key Takeaways
- Understand the unique chemistry of protein fibres and why acid dyes are the essential choice for achieving deep, light-fast shades on 100% silk velvet.
- Learn to distinguish between premium silk velvet and viscose-pile alternatives to ensure your finished piece maintains a soft, luxurious handle rather than a harsh texture.
- Master the delicate immersion techniques for dyeing silk velvet at home, including how to scour the fabric and dissolve pigments to prevent unsightly spotting.
- Discover professional rinsing and drying protocols that restore the characteristic lustre of the fabric whilst preventing the permanent crushing of its delicate pile.
The Unique Character of Silk Velvet for Home Dyeing
Imagine a fabric that drinks in light only to release it as a deep, liquid glow. This is the magic of 100% silk velvet. Unlike synthetic alternatives, this material is a pure protein fibre, which means it responds beautifully to acid-based chemistry. When you’re dyeing silk velvet at home, you aren’t just changing a colour; you’re engaging with a living texture that requires both respect and patience.
Before committing your main piece to the dye bath, it’s wise to experiment. Our natural silk packs provide the perfect medium for testing colour recipes and observing how the pile reacts to heat. You’ll notice that 100% silk offers a luminous depth that cheaper viscose-pile alternatives simply cannot replicate. Viscose often feels harsh to the hand, whereas pure silk remains supple and ethereal.
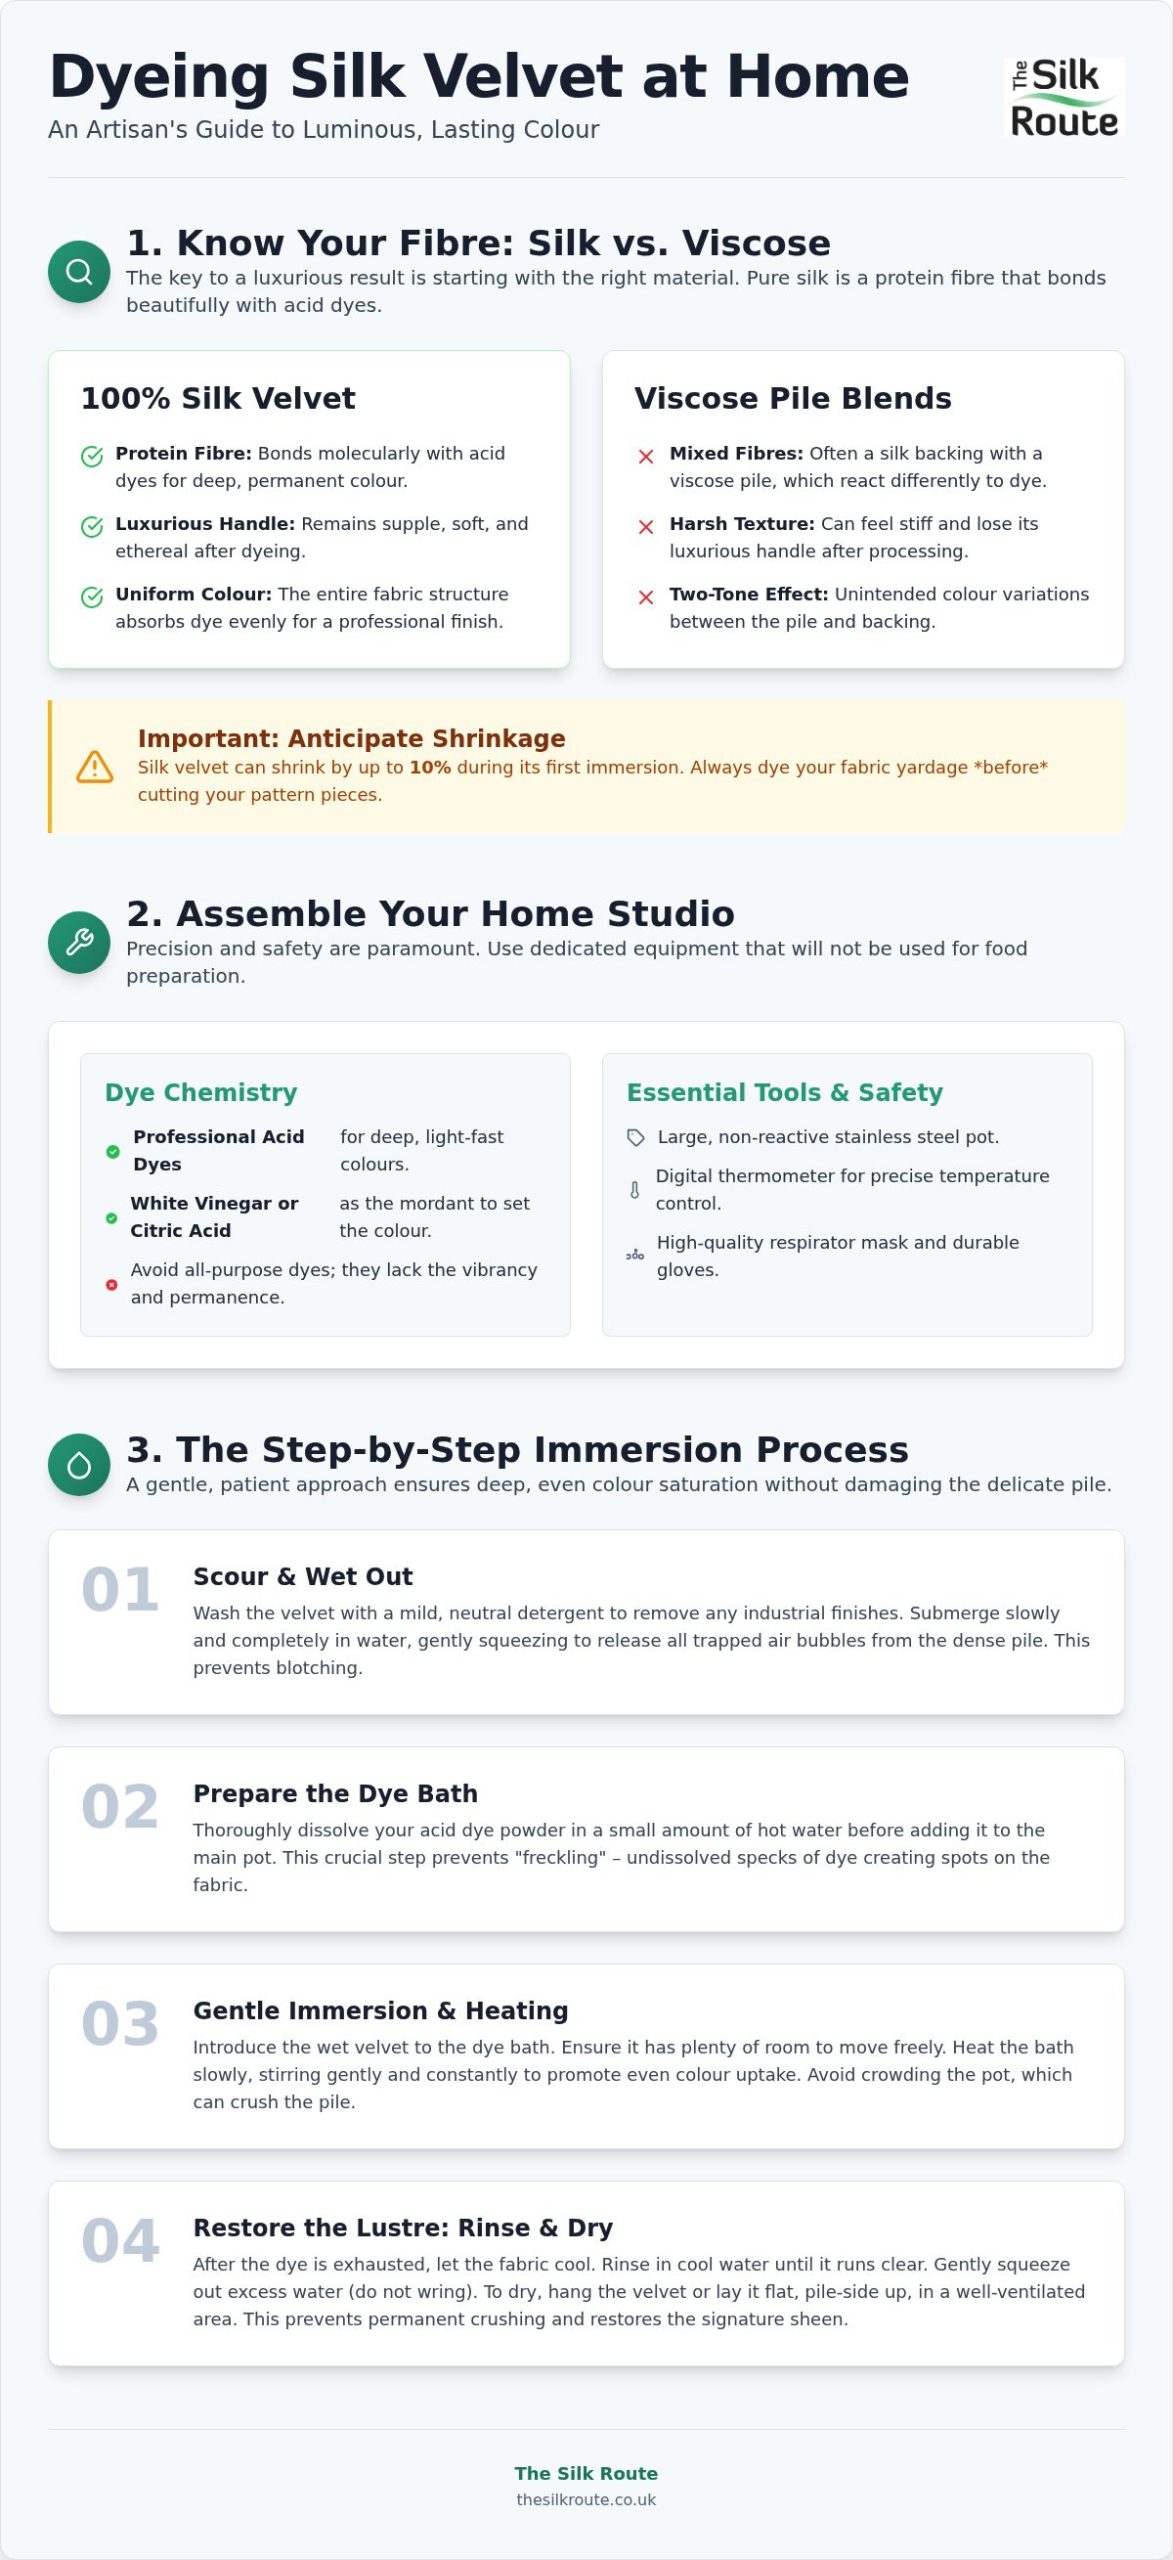
Preparation is everything. The wetting out process is your first act of patience. Because the pile is so dense, it stubbornly traps air bubbles that can lead to uneven patches. You must submerge the fabric slowly, ensuring every fibre is saturated before the pigment is introduced. This ensures the dye penetrates deep into the roots of the pile for a professional finish.
Understanding Fibre Composition: Silk vs. Viscose Blends
Many hobbyists are surprised to find that commercial velvet often uses a silk backing with a viscose pile. This creates a scrim that reacts differently to dyes, often resulting in an unintended two-tone effect. Choosing a 100% silk variety ensures the dye takes uniformly across the entire structure. It provides that professional, high-end finish you desire whilst maintaining a consistent, luxurious handle throughout the piece.
Anticipating Shrinkage and Texture Changes
It’s vital to dye your velvet before you even think about reaching for the dressmaking shears. Silk velvet can shrink up to 10% during the first immersion. By processing the yardage first, you ensure your final garment or cushion cover maintains its intended dimensions and drape. This proactive approach prevents the heartbreak of a finished piece that no longer fits after its first wash.
Essential Dyes and Equipment for Your Home Studio
Before you begin the enchanting process of dyeing silk velvet at home, your workspace must be transformed into a sanctuary of technical precision. A large stainless steel pot is your most vital vessel; it must be non-reactive to ensure your chosen pigments remain pure and vibrant throughout the immersion. You’ll also need a digital thermometer to monitor the delicate temperature shifts that coax the dye into the fibre. Safety is paramount when handling concentrated powders. Invest in a high-quality respirator mask and durable gloves, and ensure all equipment is strictly dedicated to your textile art, never to return to the kitchen.
Choosing the Right Dye Chemistry
Why do all-purpose dyes often fail to satisfy the discerning artist? Whilst they claim versatility, they rarely achieve the luminous, light-fast depth that professional-grade acid dyes provide on protein fibres. Acid dyes are specifically formulated to bond with the silk at a molecular level, creating a bespoke finish that resists the passage of time. To set these colours, you’ll need a simple mordant such as white vinegar or citric acid. This acidic environment acts as the essential catalyst, ensuring the pigment is fully absorbed rather than simply resting on the surface.
Organising Your Workspace for Success
Space is the silent partner in your creative process. Velvet is a tactile, voluminous medium that requires room to breathe. If the fabric is crowded within the dye bath, the pile may crush or the colour may take unevenly, resulting in unsightly blotches. Properly organising your studio for dyeing silk velvet at home ensures that you have the physical freedom to handle the fabric with the care it deserves. Establish a clean, well-ventilated centre for your activities where you can move freely and keep your plastic stirrers and thermometers within easy reach. If you’re still refining your palette, selecting the right silk velvet provides the high-quality canvas needed for truly professional results.
The Step-by-Step Immersion Dyeing Process
The actual immersion is where your preparation meets the alchemy of colour. Dyeing silk velvet at home requires a rhythmic, meditative approach to ensure the pigment reaches the heart of every fibre. Begin by scouring your fabric in warm water with a mild, neutral detergent. This step is essential to remove any residual sericin or industrial finishes that might otherwise repel the dye. Once scoured, ensure your dye powder is dissolved thoroughly in a small amount of hot water before adding it to the main bath. Skipping this step often leads to “freckling,” where undissolved specks of pigment create permanent, tiny dots on the velvet surface. If you work with other silk textiles in your studio, understanding how to choose the right silk fabric for painting can further deepen your appreciation of how different weaves and weights respond to pigment and dye.
Preparing the Silk Canvas
A successful result depends on a thorough pre-soak. Submerge your velvet in room-temperature water for at least thirty minutes until it’s completely saturated. As you move the fabric, watch for trapped air bubbles amongst the dense pile. These pockets of air act as barriers, preventing the dye from reaching the silk and leaving behind frustrating pale spots. Gently massage the fabric under the water to release these hidden bubbles before the immersion begins. This ensures the canvas is truly ready to receive the luminous depth of the dye.
Managing the Dye Bath
Control the heat with precision. You must guide the temperature through a slow climb, aiming for a steady range between 85 and 95°C. This near-simmer provides enough energy for the molecular bond to form without damaging the delicate silk protein or causing the pile to lose its characteristic bounce. Agitate the fabric gently with a plastic stirrer, lifting and turning it with a fluid motion to ensure even exposure. Exhaustion in dyeing is the moment the water becomes clear as the silk absorbs the pigment, signalling that the transformation is complete.
Restoring the Lustre: Drying and Finishing Velvet
After the alchemy of the dye bath, the rinsing phase acts as the final seal on your creative vision. Gently transition the fabric through a series of baths, moving from warm to cool water until the liquid runs perfectly clear. This thermal descent helps set the colour whilst ensuring the protein fibres remain relaxed and supple. It’s crucial to remember that wet silk is uniquely vulnerable. You should never wring or twist the material; mechanical stress at this stage can permanently distort the weave or snap the delicate pile, potentially ruining the work you’ve done whilst dyeing silk velvet at home.
The Delicate Art of Drying
Managing the wet weight of velvet requires a thoughtful, patient approach. Flat drying is the gold standard for this material, as the sheer weight of a wet piece can cause it to stretch and sag if hung on a traditional line. Lay the fabric across a clean, white towel and roll it gently to blot away excess moisture without disturbing the pile’s orientation. This method protects the fibres from being crushed whilst removing enough water to speed up the natural drying process. Avoid direct sunlight during this stage to protect your newly achieved depth of colour.
Reviving the Sensory Experience
How do you restore that signature bounce to a flattened pile? The secret lies in a “cool tumble” in a domestic dryer for just a few minutes once the fabric is nearly dry. This gentle movement lifts the individual fibres, awakening the fabric’s tactile depth and luminous glow. Once dry, a soft clothes brush can be used to groom the pile in one direction, restoring its uniform shimmer. If stubborn transit creases remain, a handheld steamer held at a safe distance will erase them without the risk of an iron’s weight. When finished, your velvet should possess a fluidity that rivals silk habotai fabric, draped in a bespoke shade that is uniquely yours.
Begin Your Journey into Luminous Texture
Mastering the art of dyeing silk velvet at home is a truly transformative experience that elevates a simple length of fabric into a bespoke masterpiece of light and shadow. By respecting the unique protein structure of the fibres and employing precise acid chemistry, you’ve unlocked a palette of luminous depth that synthetic blends simply cannot replicate. You now possess the technical knowledge to manage the delicate pile with absolute confidence, from the initial scouring and immersion to the final, restorative steam that brings the fabric back to life.
As a specialist UK silk supplier, we’re dedicated to supporting your creative path with exceptional quality 100% silk fabrics and unrivalled personal customer service. Your studio is no longer just a workspace; it’s a sanctuary for discovery where texture and colour converge in beautiful harmony. Take this newfound expertise and let your imagination flourish amongst the shimmering, vibrant folds of your very next creation. We look forward to being a partner in your artistic journey.
Frequently Asked Questions
What is the best dye to use for 100% silk velvet at home?
Professional-grade acid dyes are the superior choice for dyeing silk velvet at home. Because silk is a protein fibre, acid dyes create a molecular bond that ensures vibrant, light-fast results. You’ll need a simple mordant, like white vinegar or citric acid, to activate the process. Unlike all-purpose alternatives, these dyes maintain the fabric’s signature lustre and soft handle without leaving a dull or stiff residue.
Can I dye silk velvet that has a viscose or polyester backing?
You can dye blended velvets, but the results are rarely uniform. Acid dyes only bond with the silk pile, leaving the synthetic polyester or cellulose-based viscose backing in its original state. This often creates a “frosted” or two-tone effect. For a truly professional, saturated finish, we recommend using 100% silk velvet. This ensures the colour penetrates every layer of the textile with consistent, luminous intensity.
How do I prevent the velvet pile from being crushed during the dyeing process?
Preventing a crushed pile requires gentle handling and avoiding mechanical stress. Never wring, twist, or fold the fabric whilst it is wet, as these actions can permanently distort the fibres. Instead, use a large dye pot to allow the velvet to move freely. After rinsing, blot the excess moisture with a clean towel and use a cool tumble or a handheld steamer to lift and restore the pile’s signature bounce.
Will dyeing silk velvet at home cause significant shrinkage?
Yes, dyeing silk velvet at home typically results in shrinkage of approximately 10%. This is a natural reaction of the protein fibres to the heat of the dye bath. To avoid disappointment, always dye your yardage before cutting your pattern pieces. This proactive step ensures your finished garment or interior project maintains its intended dimensions and drape after the luminous transformation is complete.
Is it possible to use natural dyes like indigo or madder on silk velvet?
Natural dyes like indigo, madder, and weld are wonderful options for silk velvet. Silk’s protein structure is highly receptive to botanical pigments, though the process often requires specific pre-mordanting with alum to ensure wash-fastness. These dyes produce a unique, organic depth of colour that shifts beautifully in the light. Always test your recipes on small swatches from our natural silk packs before committing to a larger project.